Wednesday, July 10, 2013

DIY Reed Diffuser Cover (Inspired by All You Magazine)

This post is part of a social shopper marketing insight campaign with Pollinate Media Group® and All You, but all my opinions are my own. #lifeforless #pmedia http://cmp.ly/3/8vNxcO

A couple of weeks ago, I got a chance to check out All You Magazine for the first time. All You is awesome! It's perfect for someone like me, a crafty mom looking for great ideas, recipes, and money saving options. The coupons alone easily make the magazine worth it. I was thrilled to find that Publix started carrying All You Magazine, and hurried over to buy the July copy.


By far my favorite section of the magazine, was a little crafty show down, that is going to be a new monthly feature. Two craft/DIY bloggers went head to head with one challenge. I was thrilled to recognize both bloggers, who were already two of my favorites! (I won't tell you who, you'll just have to find out for yourselves. You can search here to see where All You is available near you.)

The Challenge: Take a tin can, and create a project for $5 or less that takes only 3 steps. Fun!

I decided to use Popsicle sticks to make a reed diffuser cover, but you could also use this cute little container as a lantern, a vase, a flower pot, or a pencil holder.


What you need:

1. A Tin Can
2. Popsicle Sticks
3. Paint and Brushes
4. A Glue Gun
5. Scissors
6. Optional Embellishments


What you do:

Step 1: Cut the bottoms off of your Popsicle sticks so that they are all the exact same height.

Step 2: Paint the Popsicle sticks. I painted half white and half neon pink. I wanted a little bit of the wooden texture and color to show through, so I painted a few very thin coats.


Step 3: Start gluing the sticks to the can with a hot glue gun. Put the glue on the back of the stick, right down along the center.


And you're done!


I can't wait to check out next month's All You Magazine to see the craft blogger challenge! I know that I'll be grabbing it off the shelves when I'm shopping for groceries at Publix next month.

Have you read All You Magazine? What aspect of the magazine would you be most interested in? What would you create for the tin can crafty challenge? 

Tuesday, July 9, 2013

A Cars Dream Party Celebration

I was able to throw this birthday celebration as a part of a sponsored post through Collective Bias. As always, all thoughts and opinions are my own. #dreamparty #cbias

My son Benjamin turns 4 this month, and we wanted to throw him an early birthday party to help celebrate with some extended family. What's great, is that Walmart and Hallmark have teamed up and created a great selection of everything you will possibly need for a theme party. I think I'll be headed back in December to throw my daughter a Disney Princess party. You can see my whole shopping story here. Plus, there is a great selection of birthday cakes at Walmart, like this incredible Disney Pixar Cars Cake. My son was giddy jumping up and down when he saw the cake!


I taped Instagram pictures to the blue and silver balloon strings. The effect is really amazing, especially in person. We all loved looking at all the little pictures of Benjamin as we celebrated his birthday. I taped pictures to both sides, to give a little more weight to the balloons.


I especially love this pop up Mater snack holder, and the kids love it too! It is a fun and perfect way to serve popcorn, or cookies, or chips, and it only takes about two or three minutes to assemble.


We were thrilled to find a whole new selection of Disney Pixar Cars die cast cars, like a lot of the characters from the first Cars movie. We got Benjamin Flo and Sarge as little early birthday presents. Benjamin also really loved his special birthday medal. 


And of course, Benjamin and Lyla had to play in their Cars for a little while.


I can't get over this fantastic cake. All of the little details are adorable from the cones to the grass. It's also great that this cake (and other similar ones) are available at Walmart. I would recommend calling or stopping by at least 24 hours in advance, to make sure they will have time to decorate the cake you want.


We went ahead and got some Cars party favors at Walmart too, for when Benjamin has a party with his friends. These tire yo-yos are so cute.


Benjamin loved his little Cars party, down to every detail. He came over to me after we'd eaten the cake and said "Mommy, I'm older now. I'm 4." I had to explain to him that this was an early birthday party, and that he wouldn't turn 4 until his actual birthday. He said, "Oh, my Cars birthday didn't work." He didn't seem at all upset, but he was thinking, we'll have to try again and maybe the next time the party will make me turn 4. He cracks me up!

Friday, June 21, 2013

Two Natural Looks for Summer: Natural Nude and Bold Red

*I was able to review these beauty products as part of a sponsored post through Collective Bias. As always, all thoughts and opinions are authentic and my own.

 I'm always looking for great quality beauty products at low affordable prices, however, I'm a little skeptical of all make-up until I've personally tried it out. I was thrilled to find a great selection of Rimmel London cosmetics available at Walmart for only $3.97 each (see my shopping story here). These Rimmel products are all perfect for creating a fresh and natural look for summer. Since I live in humid Florida, I especially want my summer make-up to be light and understated.

I used these Rimmel products to create two summer styles: natural nude, and bold red.


This natural nude look is my all-time favorite look. I highlighted my favorite Rimmel products above that were essential to this look: The quad eye shadow, the natural mineral bronzer, and the stay glossy lip gloss.

Tips for this natural look

1. Don't overdo your foundation. If you feel like your foundation is leaving lines or looking unnatural, use one shade lighter than you usually do. You can then add color more naturally with the bronzer. If you still want a lighter look, mix the liquid foundation with a little bit of moisturizer on your hand right before you apply it.

2. Use neutral tones for your liner and shadow. I used brown eye liner and the quad eye shadow. I used the different shades of brown to create subtle shadows and add dimension to my eyes, without making it especially noticeable.

3. Apply a little bronzer to your forehead, nose, and cheeks (basically the places where you naturally get sun). Then apply a light layer of pressed powder (in the same shade as your foundation) to the rest of your face.

4. Don't forget lip gloss. This pink gloss is subtle, but is the perfect finishing touch. I love this Stay Glossy lip gloss, because it feels like a cross between lip stick and lip gloss, and it doesn't feel too sticky.


I have to confess, red lipstick makes me nervous. I see other people wearing it, and I love the look. However, I sometimes shy away from bold looks, plus, I hate the thought of it smearing or rubbing off. But now, red lips is a new summer staple for me, thanks to the Lasting Finish by Kate Lipstick.


Tips for this bolder summer look:

1. Stay with the light and fresh make-up look from above to keep the focus on your red lips. You also want to avoid too many bold things at once.

2. Use neutral tones for your eye shadow. I would stick with shades of brown, gold, and gray, according to your skin tone.

3. Scrub your lips with a wash cloth before applying your lipstick for a smoother and more polished look.

4. After you've applied your red lipstick, add a little bit of a lighter shade of lip gloss to the middle of your lips for a little dimension.

5. Pair this bold look with a neutral colored shirt (maybe even one with a bold geometric pattern). I added a coral headband and sunglasses to compliment the red lipstick, and to help pull my bangs back.


Check out this summer lifestyle magazine that features tips and looks from Rimmel London:


What is your favorite summer make-up look? Are you more of a natural nude or a bold red? 

Monday, June 3, 2013

Samsung Smart Camera Review Plus How to Take White Background Pictures

*This is a sponsored review through Collective Bias. As always, all thoughts and opinions are my own.
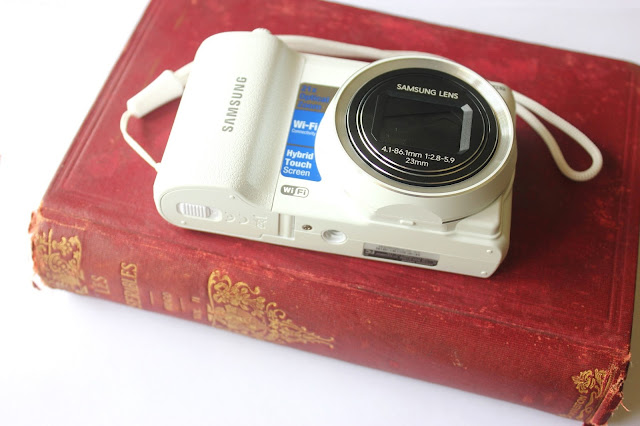

As a blogger and a mom of two, I take a lot of pictures. I want to capture all of the cute moments, and hate the thought of missing one. I have a larger DSLR camera that I use for photos of my tutorials, and that I use to take pictures of my family. However, it's so bulky that I don't bring it with me most of the time, and I rely on my cell phone to take a lot of pictures. In a lot of ways, I love taking pictures with my iPhone. It's quick, convenient, and easy to share on Facebook. And when the lighting conditions are perfect and the subjects are still, the pictures turn out pretty well. But, let's be honest. How often does that happen? I have so many almost adorable pictures of my kids on my phone that are either way to grainy or way to blurry. It's also very difficult to zoom really at all and have the pictures turn out well. I really needed a compact camera with a long zoom that performs well for low light photography. 

* I took about 10 pictures of my kids holding hands with my iPhone, and this was BY FAR the best one.
Introduce the Samsung Smart Cameras. It has all of the great things I love about my phone (portable, convenient, easy to share), PLUS it also takes great pictures in a lot of different situations, even when conditions aren't ideal.

I got this Samsung WB800F camera at Sam's Club, where it was on sale. Check out my shopping story here. It came with an 8GB memory card, and a cute white camera case.
Here's what I LOVE most about this camera:

1. Wireless - This camera is wireless! It's amazing and really easy to use. It's great because you can use the touch screen to set up your wireless network and then instantly share pictures to Facebook, or send them in an email.

But what I love most about the wireless feature is that you can connect it to your smart phone (you have to download a free app on your phone). So when you're out and about and away from a wireless connection, you can still easily send the photos to your camera roll, and then conveniently edit and share to Instagram and Facebook from your phone.

Last week, we took the kids to Sea World (hooray for living in Orlando!). I was able to take some great pictures of them, move them over to my phone, edit with some fun apps, and then upload to Instagram and Facebook while we were waiting in a line.


2. Zoom - I was shocked at the zoom on this tiny camera. This Samsung Smart Camera has a 21x optical zoom (compare to the 5x zoom on the iPhone 4). It is ridiculous.

Here are two pictures I took in the Sea World parking lot. They were taken at the same time, and weren't cropped at all. The first picture is all the way zoomed out to show you how far away I was. The second picture is zoomed all the way in on my husband pushing the stroller to our car. Also note that he was moving and the lighting was getting low, but the picture is still very clear, even from SO far away.


3. Touch Screen - The touch screen feature of the camera makes it so easy to use and navigate. You can do things like click on the part of the picture you are taking that you want to be in focus, set your options, scroll through and view your photos, and set up and share wirelessly all with the touch screen.
4. High Quality Photos - The photos are really high quality. They do not get the fine detail as well as my DSLR does, but the pictures are much better quality than the pictures I've been taking with my phone. That also means that I'll be able to blow them up to a larger size to print or view on Facebook without loosing quality like you do with photos taken on your phone.

These photos from our trip to Sea World were taken with my Samsung Smart Camera and are not edited. 


5. More Control Over Your Pictures - Even though I'm far from a photography expert, I do like to have some degree of control over my pictures, and have a way to not just take pictures on full auto. When the lighting and conditions are perfect, then the full auto setting works well. However, if you are dealing with low lighting, fast moving kids, or a bright background, the automatic camera settings are not always going to be ideal. For example, I love to take pictures of things with a plain white background. However, this is surprisingly a difficult task. Here's a quick tutorial to show you how to take high quality pictures with a white background with this Samsung WB800F. You can also follow these same general instructions with other digital cameras.

How to Take Quality White Background Pictures Without a DSLR

1. Choose the right kind of white background. I recommend using a white foam core poster board. You could also use white printer paper or cardstock, but I do NOT recommend using sheets, fabric, or an off-white.

2. Lighting. Do NOT use your camera's flash for white background pictures. The idea situation is natural indirect sunlight. Some places you might find this: Outside on a cloudy day, outside on the shady side of your house, or inside your house next to a window. If the light is too bright (for example outside on a bright sunny day), then your picture will have dark shadows and a harsh look. At night, you can use a light box or some natural sunlight lamps. I took these pictures inside at night with two OttLite Lamps.

3. Set your camera to the P (Program) setting. This will allow you to control what you want on your camera, while letting the rest of the functions remain automatic.

The reason that white background pictures do not turn out well on full auto: Your camera reads the amount of light that is coming in, and then decides accordingly which settings to use. So when you are taking a picture of a darker object in front of a large white background, your camera reads all of the light coming in from the white background, and adjusts accordingly. What you're left with is a picture with too little light, where the white background looks gray, and your subject is too dark. You need to tell your camera to let in more light!


4. Click on the Fn button on the bottom right screen to adjust the exposure levels. I set mine almost all the way to +2. Take a few pictures, and adjust accordingly.


5. Now you'll have great pictures where the background actually looks white, and the subject is vivid and bright.
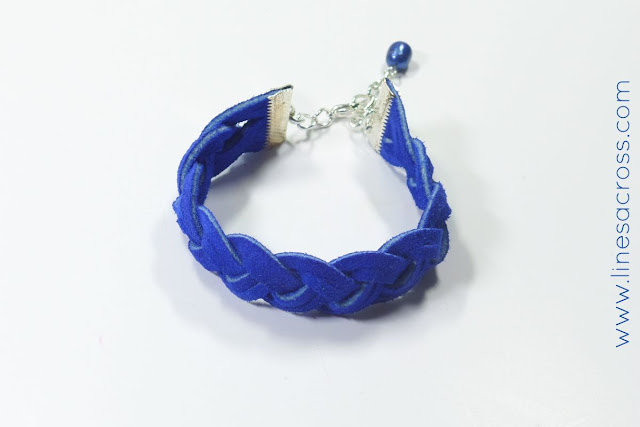
This picture is not edited. It was taken with the Samsung WB800F with the exposure adjusted to +2.
6. If you want to make the pictures even a little better, you can do 2 quick and simple edits with your photo editing software or program to make them even better. Increase the brightness and the contrast.
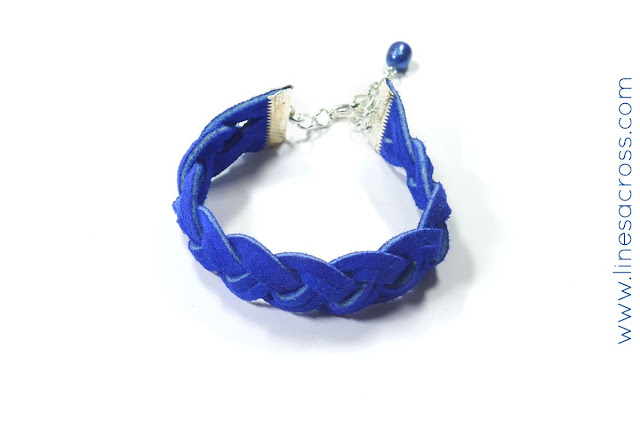
This is the same picture as above. The contrast and brightness of this picture were increased. No other editing was done.
Once you get the hang of this process, it is SO EASY to take great white background pictures. The touch screen of the Samsung Smart Camera makes it so quick and easy to use.

For more information, you can follow along with Samsung on Facebook or Twitter.

LinkWithin

Popular Posts