Thursday, January 10, 2013

Hosting a Party for the Big Game with World Market

We love football, and especially love having friends over to watch the Big Game. This week, I got the chance to shop at World Market for supplies we will need to host a fun football party. I LOVE LOVE LOVE World Market, because not only can you find great furniture, serving ware, place settings, and centerpieces there, but you can also find a fantastic selection of food and drinks, many of which are not available at most grocery stores.


I wanted to set up a buffet table in the back yard with snacks, drinks, and napkins. I got this gorgeous Laurel  table runner and two sets of buffet napkins: Ocean Blue, and Golden Yellow. These colors are the theme for the overall table.


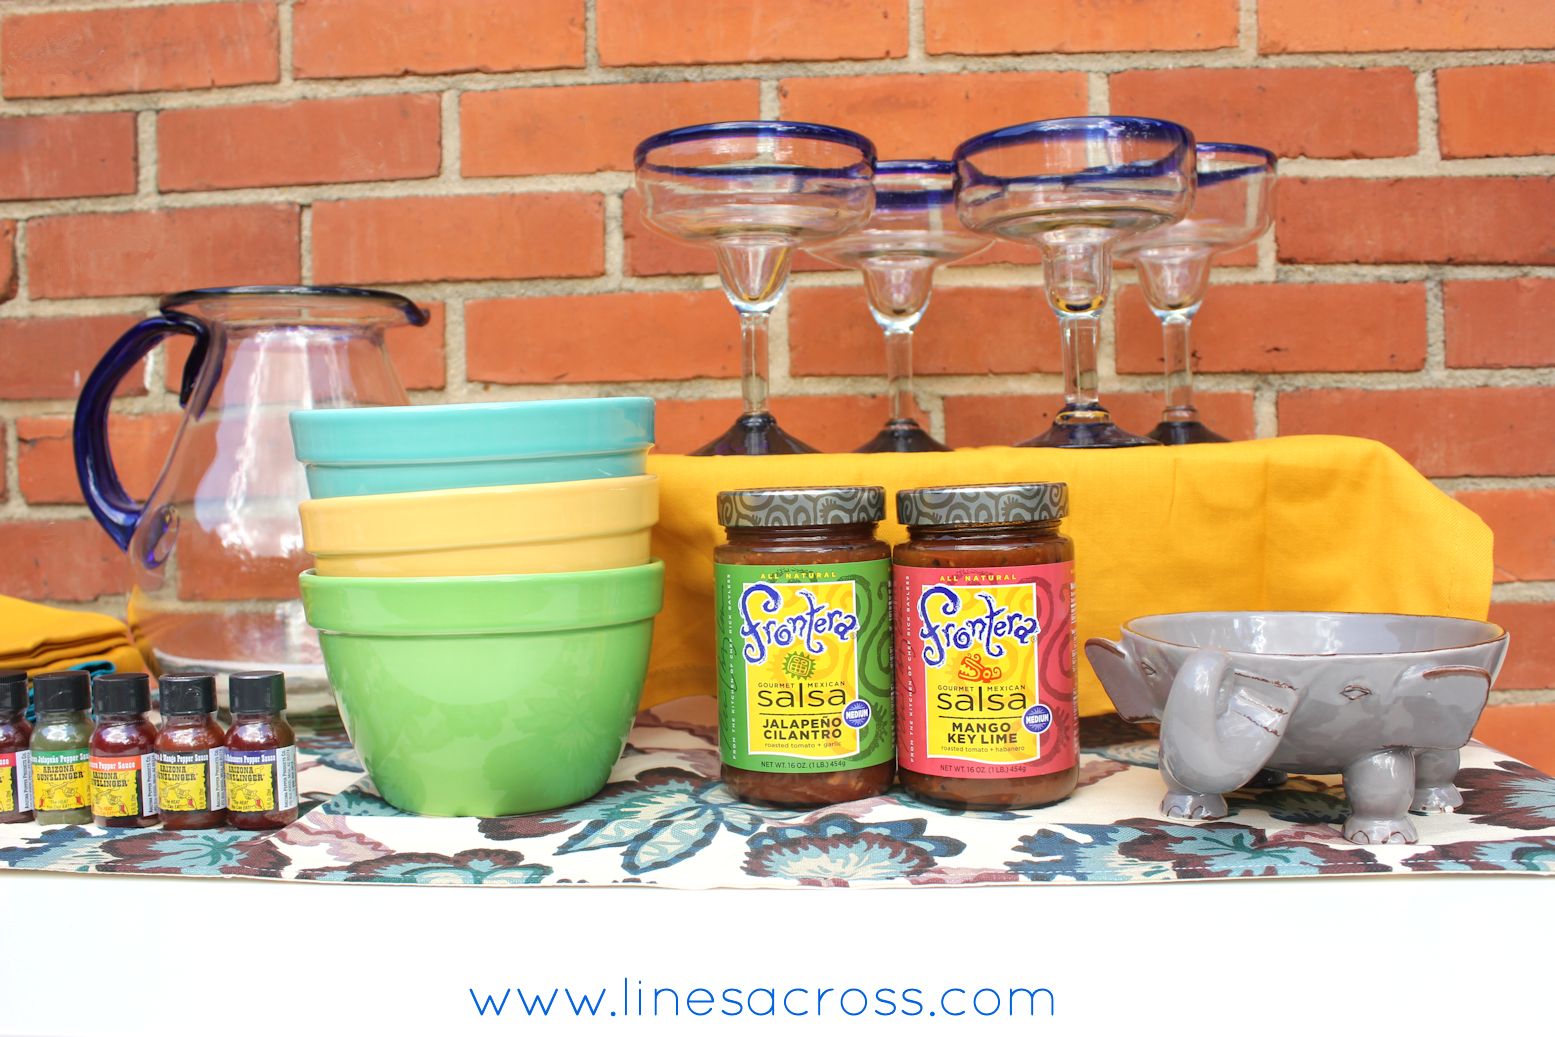
I also purchased some beautiful margarita glasses and pitcher with gorgeous cobalt blue handles and rims. World Market carries a lot of great drink mixes, and I went ahead and bought some organic margarita mix. I'm so excited to serve it in my new glasses.

I found three ceramic mixing bowls in green, blue, and yellow that are perfect for serving chips.


And this little guy? Too cute! I think this little elephant serving bowl might be my favorite World Market find of all. A perfect way to serve these fun football shaped pretzels.


Here are all of the food items I found at World Market:

1. Utz Football Shaped Pretzels

2. Frontera Tortilla Chips

3. Frontera Blue Corn Tortilla Chips

4. Tres Agaves Organic Margarita Mix

5. World Market Sparkling Mineral Water

6. Frontera Salsa (So delicious!): Jalapeno Cilantro and Mango Key Lime

7. Arizona Gunslinger Hot Sauce Sampler Pack (My husband is especially excited about this)


I am really obsessed with serving things in individual containers. My sister-in-law, Jill, made something similar to this at her daughter's amazing Mississippi River themed first birthday party. I found these small square glass containers at World Market that were perfect for this individual layered chip dip. Plus, I love how you can see all of the layers along the side.

Individual Layered Chip Dip

Ingredients:

1. Ground Beef
2. World Market Taco Seasoning (Ridiculously delicious! So much better than the packaged taco seasoning from the grocery store.)
3. Sour Cream
4. Diced Tomatoes
5. Shredded Cheese
6. Frontera Jalapeno Cilantro Salsa (from World Market)
7. Diced Green Onions


Directions:

1. Brown 1 pound of ground beef. Follow the instructions on the World Market Taco Seasoning (Add 1/4 cup seasoning and 3/4 cup water).

2. Add a layer of Frontera salsa.

3. Add a layer of sour cream, and spread it out evenly.

4. Add a layer of diced tomatoes.

5. Add a layer of shredded cheese.

6. Add a layer of diced green onions.

(Optional: You could add other layers such as queso, refried beans, or guacamole)


These little glass containers are great! They are such a good value and are great for so many fun individual sized treats.

Do you love World Market like I do? Follow along on Facebook, Pinterest, and Twitter.

Also, enter the World Market Sweepstakes below:

This shop is part of a social shopper marketing insight campaign with Pollinate Media Group™, but all my opinions are my own. http://cmp.ly/3/8vNxcO

Monday, January 7, 2013

Ready for Some Football with Rubbermaid

We love football at my house. Go Cowboys! One of my favorite parts about football is how it brings friends and family together, whether at a fun tailgating party, through "did you see that play?!" phone calls to your dad during a big game, or through a Sunday afternoon curled up on the sofa with your family cheering for your favorite team.


It's great to be prepared for any parties you might be attending (or hosting) this football season. One of our favorite snacks to take with us (or serve) is chips and dip. In the past, I've brought a bag of tortilla chips and a jar of salsa to a friend's house, only to have them have to find bowls for them. Other times, I've brought nice dishes covered in plastic wrap, spilled salsa in my car, and left my favorite dishes behind. Now, I've found Rubbermaid Take-Alongs and Easy Find Lids, and I have a new go-to way to take snacks.

What's GREAT, is that Target is offering coupons for these Rubbermaid products. (You can print the coupons HERE).


Here's what I did: I used one of the large Take-Along Rubbermaid containers for the chips. One bag of tortilla chips fit perfectly in this container. These containers also are a great value, so you won't have to worry about accidentally leaving one behind. They also have a no-leak seal so that you can transport all kinds of things without worrying about spills in your car.


Then, I used some of the smaller Easy Find Lid Rubbermaid containers for salsa and guacamole. I especially love these Easy Find Lid containers. The lids snap onto the bottom of the containers, so that you won't loose them. You can even stack all of the lids together. I used some of the smallest of these containers to take extra sides to go with the chips and dip: shredded cheese, diced tomatoes, jalapeƱos, and fresh cilantro. These are great for on the go, or for storing food at home. We don't have a lot of storage in our kitchen, so I especially appreciate how easily they stack together and store neatly.


Don't forget to print these great Rubbermaid coupons at Target's website. There is one coupon for the Easy Find Lids containers and one for the Take-Alongs.

Rubbermaid is hosting a Game Day Party Sweepstakes.  They are offering the chance to win an Easy Find Lids Party Pack, a 48Qt Cooler and $100 VISA gift card! Awesome!

Enter to win HERE. (Entries are limited to one entry per person / per email address / per day. Sweepstakes starts December 19, 2012 and ends January 21, 2013.)

Connect with Rubbermaid: Twitter, Facebook, Pinterest

What about YOU? What is your favorite snack to bring to a party? Which of these containers would you want to try out?

“This shop is part of a social shopper marketing insight campaign with Pollinate Media Group™, but all my opinions are my own. http://cmp.ly/3/8vNxcO

Tuesday, December 4, 2012

How to Make Family Holiday Videos from your Pictures

This Thanksgiving, my kids and I were able to take a wonderful trip up to Atlanta to my aunt and uncle's house. We had an amazing time, although we were really sad that my husband Grant couldn't make it because of his job. It was so wonderful spending time with my cousins, my parents, my brother, my aunt and uncle, and even more extended family. That weekend, we also attended a special party to celebrate my cousin's marriage.

So, as you can imagine, I took a million pictures. There are so many wonderful ones, and sometimes I get so overwhelmed that I don't end out doing anything at all with them. But now I've found a new AMAZING online tool that allows you to EASILY create fun videos from your pictures and video clips, called Animoto.

When I first signed on using my Facebook account, I was given a chance to make an instant video with pictures selected from my Facebook profile. It only took a couple of minutes to load, and one click of the mouse on my part to create a really fun 30 second video. I think I might start making videos of everything now.

You can use the promo code busyparents to create a free full-length video. (The 30 second videos are always free). Here is the video that I made from my Thanksgiving pictures. I love how it turned out, and I'm really excited to share it with my family!


I love how simple Animoto is to use, and yet how many choices you have. I selected the Autumn theme which fit perfectly with all of the leafy pictures. I also got to choose the song, and which pictures to highlight.

Be sure to check out this holiday busy parent's video guide with a lot of great tips. Animoto also has an awesome iPhone and Android ap that lets you create videos on the go from your phone's pictures. How great is that?

I also made another video for my daughter who is turning 2 this week. She really gets a kick out of getting her picture taken, and I know she is going to love this quick video. For this one, I just used Instagram pictures of her. I was able to download them easily straight to Animoto. This entire video took me less than 5 minutes to create.


Now, once you've made your videos, you have lots of ways to easily share them with your family and friends. You can download them directly to your YouTube account, or you can just share them on Facebook or Twitter.


Like my video? Make your own and enter to win a prize!
Animoto has graciously offered the code busyparents to my readers, which is good for a free video download. And that’s not all! When you use that code to download a video between now and December 15, you’ll automatically be entered to win a copy of "Capturing Life Through Better Photography" (MSRP $70) by Tamara Lackey, the woman featured in this episode of "Busy Parent's Guide: Photo & Video Tips for Parents for the Holidays." Additionally, you can use the code clever until December 15 to receive 20% off a year of Animoto service. All rules and requirements regarding this sweepstakes can be found here.
I was selected for participation in this campaign as a member of Clever Girls Collective.

Tuesday, November 27, 2012

Geometric Christmas Bunting

I wanted to make a little Christmas bunting this year to drape across the tree, or to hang across a doorway. I was wanting to make a simple one with a modern look.


When I received this AMAZING box full of shimmery goodness from Tulip Shimmer, I was first drawn to the gold Tulip Shimmer Sheets. I knew they would give this project the metallic look I wanted. Plus, I have been really into gold this year.


What's great about these Tulip Shimmer Sheets is that they are easy to use. You can cut them with scissors, or use a paper punch, or even use a die cutting machine. Then, all you have to do is iron the sheets onto your fabric. I also especially love the Tulip Shimmer Paints that came in the box, and the fun fabric markers. They are so useful for many projects, and I've already made a handful of little doodled gift bags with them.

What you need:

1. Felt (I used blue, red, and light blue)
2. Scissors, a paper punch...
3. Tulip Shimmer Sheets (I just used gold for this project)
4. Iron
5. Yarn or ribbon

What you do:

1. First cut out your felt triangles. I actually used the fabric markers to trace the shapes. I used red for red, blue for blue, and turquoise for light blue, so that it wouldn't be noticeable around the edges.

2. Now cut out the shapes you want from the shimmer sheets. I cut geometric shapes. At first I was going to use both silver and gold, but then I decided that it would look best in JUST gold.


3. Cut out shapes with your paper punch. IMPORTANT: At first, I could NOT get the paper punches to work with these sheets. They just crinkled (as you can see in this picture) and got stuck in the punches. Then I tried putting the shimmer sheets in between a folded piece of printer paper, so that there was paper on both sides of the sheets. This worked perfectly. After I tried this, I could easily use any of the paper punches with the shimmer sheets.

4. Arrange the felt triangles and shapes on your ironing board. Make sure that the right side is down, and that there aren't pieces of the shimmer sheets that extend beyond the edges of the felt (or you will attach them to your ironing board, haha). Cover them with a thin piece of fabric, and then dry iron for about 40 seconds, continuously moving the iron.

5. Now attach the triangles to your ribbon or yarn. I used a hot glue gun to attach the backs to a piece of ivory yarn.


Now hang and enjoy :)


For more Tulip Shimmer information and inspiration, check out I Love to Create, or follow along on Facebook, Twitter, or Pinterest.

You can also check out these other awesome holiday projects made with Tulip Shimmer products.


*I was provided with these products to review and compensated as a part of a paid campaign. All opinions are 100% my own.

Wednesday, November 21, 2012

Pumpkins and Spice and Everything Nice


I’m a huge coffee-lover. I love trying new flavors, and I look forward to waking up to a fresh cup of coffee every morning. Although I do sometimes enjoy getting coffee out and about, my favorite cup of coffee is one that I brew right at home, in one of my favorite mugs, with no sugar, just cream. My husband, Grant also loves coffee, and starts a pot for me in the mornings when he leaves early for work. It’s such a small thing, but a sweet way he shows me he loves me and is thinking about me. Since he especially enjoys iced coffee, I set some aside for him in the refrigerator with cream for him to enjoy when he gets home, and he too knows I was thinking about him.

Lately, we have become obsessed with Dunkin' Donuts coffee, with delicious taste, a variety of flavors, and a great price, conveniently located at your local grocery store. Since these fabulous holiday varieties, mint mocha, pumpkin spice, and gingerbread cookie, are only available for a short time, we are planning on stocking up on our favorite, pumpkin spice, so we can continue to drink it throughout the year.

I have many fond memories of drinking coffee with my family when we get together for the holidays. After Thanksgiving dinner, we brew a pot of coffee, and all sit together around the table playing board games late into the night. The wonderful smells of holiday coffee add to that feeling in the air that it’s a special time of year.

This year, stock up on Dunkin' Donuts holiday coffees for Christmas gifts, stocking stuffers, or last minute hostess gifts for holiday parties. The bags come with little gift tags for easy or last minute gifting.
Here is a cute little gift package craft idea I’ve put together for you. I was planning on using permanent markers to write on the mugs (as I’ve seen all over Pinterest), but some people have commented that it wears off too easily. Instead, you can use a porcelain pen or paint marker, and follow those instructions. Make sure that you don’t write near where people will be drinking, or on the inside of the cup, and then make sure to hand wash only.

Photobucket

On the front, it says “Pumpkins and spice…” and on the back, “…and everything nice.” I added a little pumpkin to the top of the mug, and paired it with a bag of Dunkin' Donuts Pumpkin Spice coffee. I think the little pumpkin is adorable, but if you wanted to make the gift more compact, you could use a wider mug and put the bag of coffee directly inside.

Photobucket

Thank you to Dunkin’ Donuts® packaged coffee at grocery for being a sponsor. I was selected for this opportunity as a member of Clever Girls Collective. All opinions expressed here are my own.

Thursday, November 8, 2012

How to Sell Handmade Items (and More) Directly from your Blog or Facebook Page

I started this blog over a year ago, and I LOVE LOVE LOVE making things. However, I only recently opened an Etsy shop last month with my cousin. This is party because I was overwhelmed with all of the aspects that go into setting up a shop: coming up with a name, designing a logo, building up stock, paying up front to list items, and dealing with a crowded Etsy marketplace. Don't get me wrong, I'm glad that my cousin and I have gone through all of these steps in setting up our shop, but if I had known there was a way to easily sell handmade items (and more) directly from my blog and Facebook page, I would have been doing it from day 1.


Let me introduce you to SHOPLOCKET. It is SO RIDICULOUSLY simple to use. You can sign up with one click by using your Facebook account. Then, you're able to immediately list an item. It took me less than 5 minutes to list my first item. You don't have to enter credit card info or anything. All you have to do is choose if you want to be paid by Stripe or Paypal. I use Paypal, so I entered my Paypal email address, and voila! Then click publish and you can copy and paste the HTML code to embed directly onto your blog. You can also share through your social media with just one click.

The BEST part is, you don't pay a penny unless an item sells! When you do make a sale, ShopLocket only takes 2.5% as a fee. You will or course also be charged a small percent by Paypal or Stripe. (As a comparison, Etsy charges 20 cents to list each item and then also takes an additional 3.5% of the sale price.)

I love sharing tutorials for making jewelry, like these Geometric Silver Bead Bracelets. Even though I've showed you how to make them, there will still be a lot of people who will be interested in buying them. That's why I've started listing items like these for sale at the bottom of the tutorial post using ShopLocket.


ShopLocket is also a great way to sell seasonal items like Christmas ornaments. I also listed and embedded these Ice Cream Cone Ornaments at the bottom of the tutorial.


I also listed these bracelets at the bottom of a tutorial for a similar bracelet.


Let me show you with a couple of screen shots just how easy ShopLocket is to use.

1. When you sign in, you are taken directly to this simple page. You can list an item by filling out a product name, description, and price, and by adding at least one photo. (If you're selling an item that you've already made a tutorial for, you can use pictures you already have).


2. Click on Advanced options to add things like additional choices of size or color, and a shipping cost. You can also choose from a few layouts for different looks.


3. Click PUBLISH, then you are taken to a page like this. You can easily share and promote your product through Facebook, Twitter, Pinterest, or Email. Copy and paste the EMBED code into the HTML section of a post on your blog.


4. Once you've listed a few items, you can view and manage them directly on ShopLocket by clicking on your Products tab. You can see how many views and sales each item has gotten.


Here are a few more GREAT ways that you can use ShopLocket. Sign up for free and try it out.

1. Sell items from your closet or your kids' closets. Maybe even create a tab at the top of your blog called "Shop my closet".

2. Sell digital files like those cute social media icons you made or a printable quote or template.

3. Put together a crafty pack with all of the supplies needed for one of your tutorials, and embed it at the bottom of the tutorial.

4. When you create a tutorial and include a free template (like this post I did with these LEGO gift boxes) create an additional template in a different size and embed it at the bottom of the page. I LOVE this idea because you don't have to buy supplies, make anything new, or pay to ship. You could sell the same file thousands of times at a low rate with no extra cost or effort from you.

Seriously, I'm in LOVE with ShopLocket. Definitely expect to see more of it around Lines Across in the near future. As an added bonus, ShopLocket is giving away FIVE $100 Michael's gift certificates to people who sign up over the next two weeks. AWESOME!

Enter by signing up for ShopLocket and then using the Rafflecopter widget below.

a Rafflecopter giveaway

Follow ShopLocket on Facebook and Twitter.

Disclosure: This post is sponsored by ShopLocket. All opinions are 100% my own. 

LinkWithin

Popular Posts