*I was able to review the Walmart Family Mobile plan as a part of a sponsored post through the Collective Bias Social Fabric Community. As always, I only review things that I really love and all thoughts and opinions are my own.
Last month I shared about the awesome gift I picked out for my husband Grant - his first smartphone. He has been using a really cheap and sad phone to save money, and I wanted him to have a nice phone where he could actually send and receive quality picture messages, talk to his family and friends as long as he wanted to, look up directions on the go, and even play games while waiting in line. The crazy part is that the Unlimited Wireless Plan from Walmart Family Mobile is the same price per month that we were already paying!
My kids were so excited to help give their dad his new phone. We ended out giving him his smartphone and 3 months of service on the Walmart Family Mobile plan about a week before Christmas. He was thrilled and couldn't wait to start using it. He found that I had already activated it and set up this adorable picture of our daughter Lyla as his background. I think he was even more excited to find out that the plan was only $39.99 per month for UNLIMITED talk, text, and data. Plus, there are no overage charges or hidden fees. You're just billed at the end of the month for your service. You can easily view and manage your account online. It's the gift that keeps on giving.
The past few weeks have actually been a little rough for our family. We've all had this terrible cold and flu going through the family. It just doesn't seem to end. And now, my dad who was here visiting is in the hospital for severe pneumonia. We spent Christmas Eve and the day after Christmas at doctor's offices, plus I'm 27 weeks pregnant and already busy and exhausted. Grant has used and needed his new phone and unlimited plan more than ever, and it really has made our lives a tiny bit simpler and easier over the past couple of weeks.
Lately, I’ve been feeling a little out of sorts. I just entered the third trimester of my third pregnancy, which means I’m also chasing around my two kids who are 3 and 4. Whenever I have a little bit of time to myself, I spend it napping or resting. I really enjoy getting dressed up cute and wearing my hair down or braided, but lately I feel like I’ve been wearing my hair up in a sad little ponytail every day.
Part of the reason for this is that I have really thick hair. It’s mostly straight, with a few almost-curls in the back, with a lot of volume and body. This may sound like a good thing (and in many ways it is), but it just means it takes me a lot longer to take care of it. I almost NEVER dry my hair. It just takes too long. Plus, drying it seems to make it bigger, and I still have to straighten it. But especially around the holidays where there are so many different Christmas parties, events, shows, and family gatherings, I want to take a little time to look nicer. But of course, things are so busy that I have less time than ever to spend on my hair.
So when I got a chance to try out the Infiniti Pro by Conair Hair Designer Drier that dries, conditions, and straightens all at once, I was thrilled. There is a cool attachment at the front of the drier that acts like a comb to hold your hair in place while the drier gently dries your hair. The attachment can be turned at different angles, and the settings can be adjusted for different textures of hair. It looked a little complicated when I first opened it, but it was really easy to use. In fact I was able to snap a couple of selfies with one hand while using the drier. There is also a little roller at the top that is lightly coated with Argan oil to prevent breakage and keep your hair shiny and smooth as it dries.
I have been very happy with how my hair looks after using this nifty drier. It does seem to dry your hair much more quickly while leaving it straighter and smoother than a traditional hair drier. You can have a salon quality look at home! I still have to straighten the little bumps in the back of my hair after using the drier, but it has turned a 15 minute hair straightening routine into a 1 minute one. Plus, it knocked off about 15 minutes from the time that it usually takes me to dry my hair. That’s precious extra time to spend on putting together a cuter outfit, spending fun quality time with your family, or just reading in bed and resting.
Here are a few pictures that show the before, during, and after process of using the Infiniti Pro by Conair Hair Designer Drier. The after pictures show my hair after quickly using the hair drier and nothing else. I also decided to stick with cell phone selfies to give a real and unedited view.
I also got a chance to try out the True Glow Conair Sonic Cleansing Brush, which is another quick and simple way to enhance your beauty routine at home. It cleanses and exfoliates your skin (both face and body) with professional results. It’s easy to use with 3 different speeds, 2 different brush heads, a 60 second timer, and a convenient charging stand. Whether you are using it at your sink to wash your face at night, or in the shower to exfoliate your skin and make it smoother and softer, it’s easy to incorporate the True Glow Conair Sonic Cleansing Brush into your daily beauty routine.
The Infiniti Pro by Conair Hair Designer Drier can be found exclusively at Target for an average retail price of $39.99 and comes with a two-year limited warranty. You can also follow along with Conair on Facebook.
This is a Sponsored post written by me on behalf of LEGO for SocialSpark. All opinions are 100% mine.
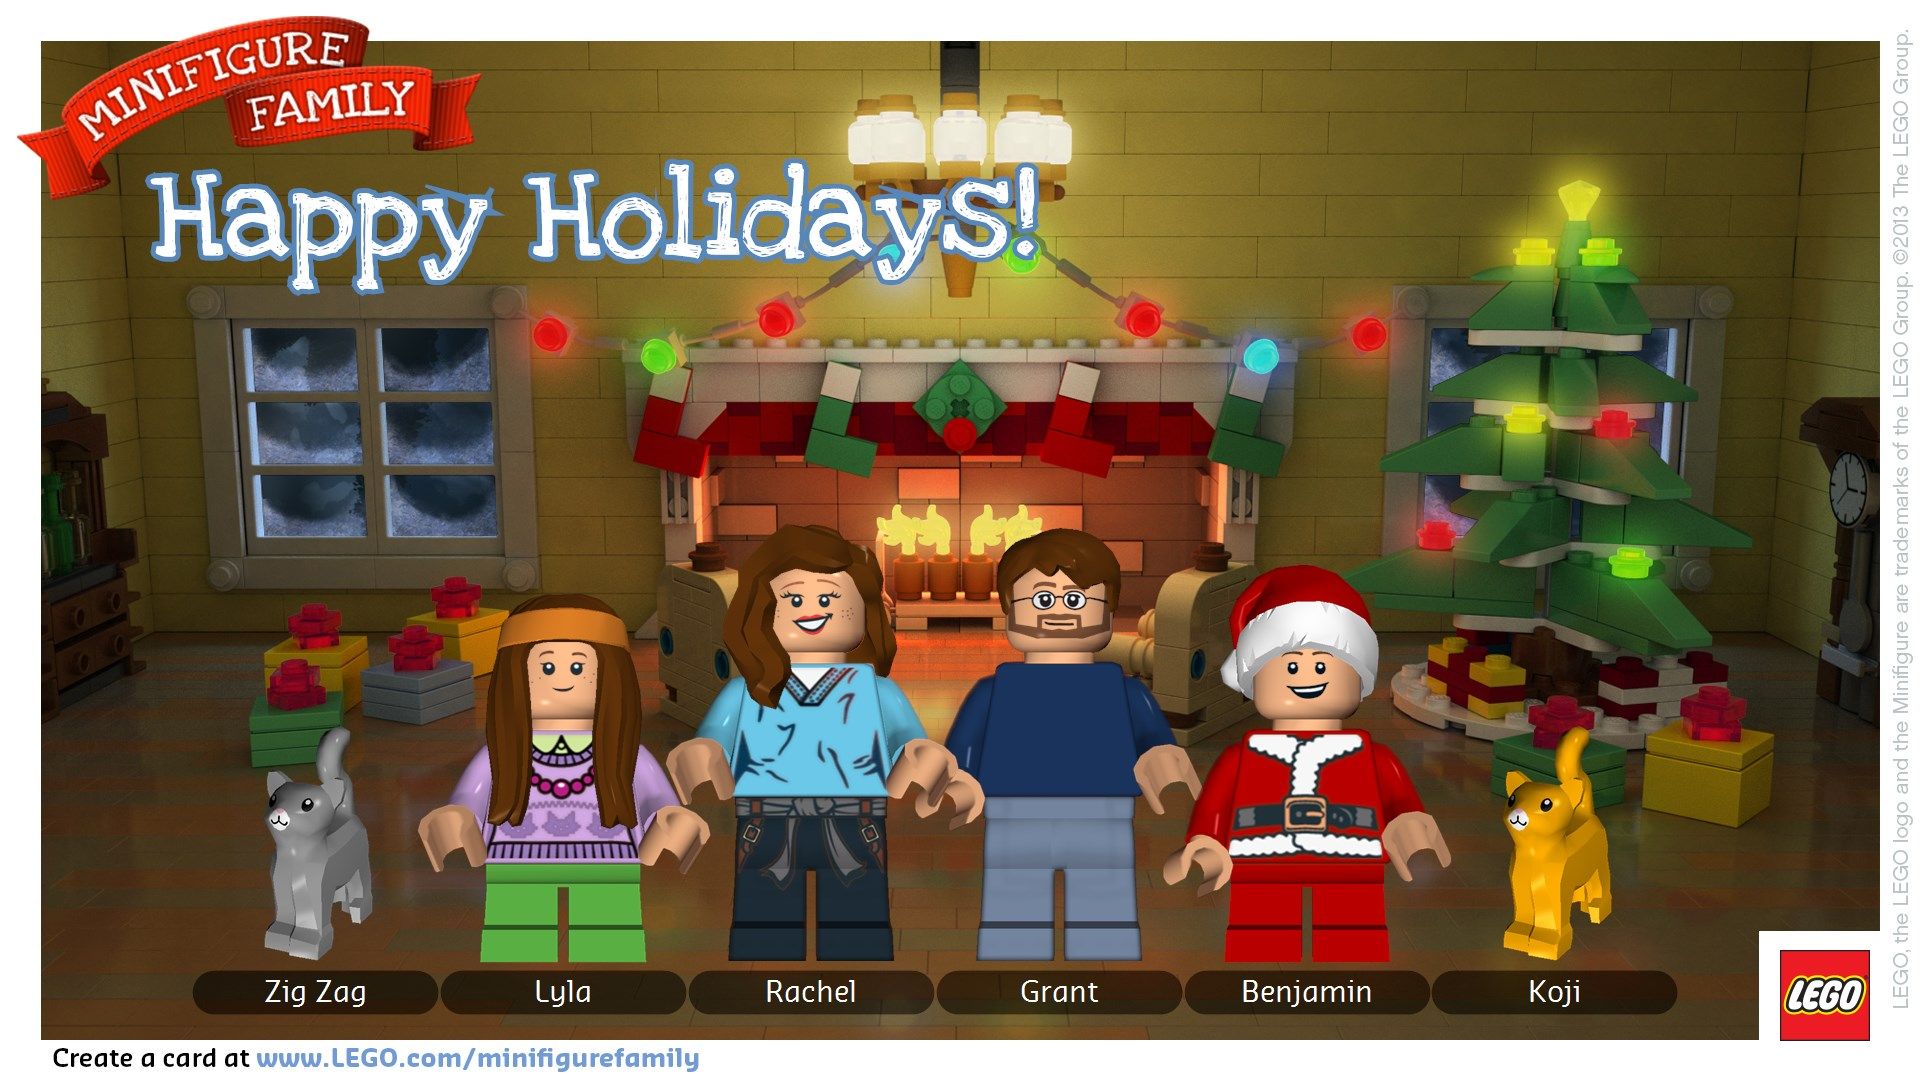
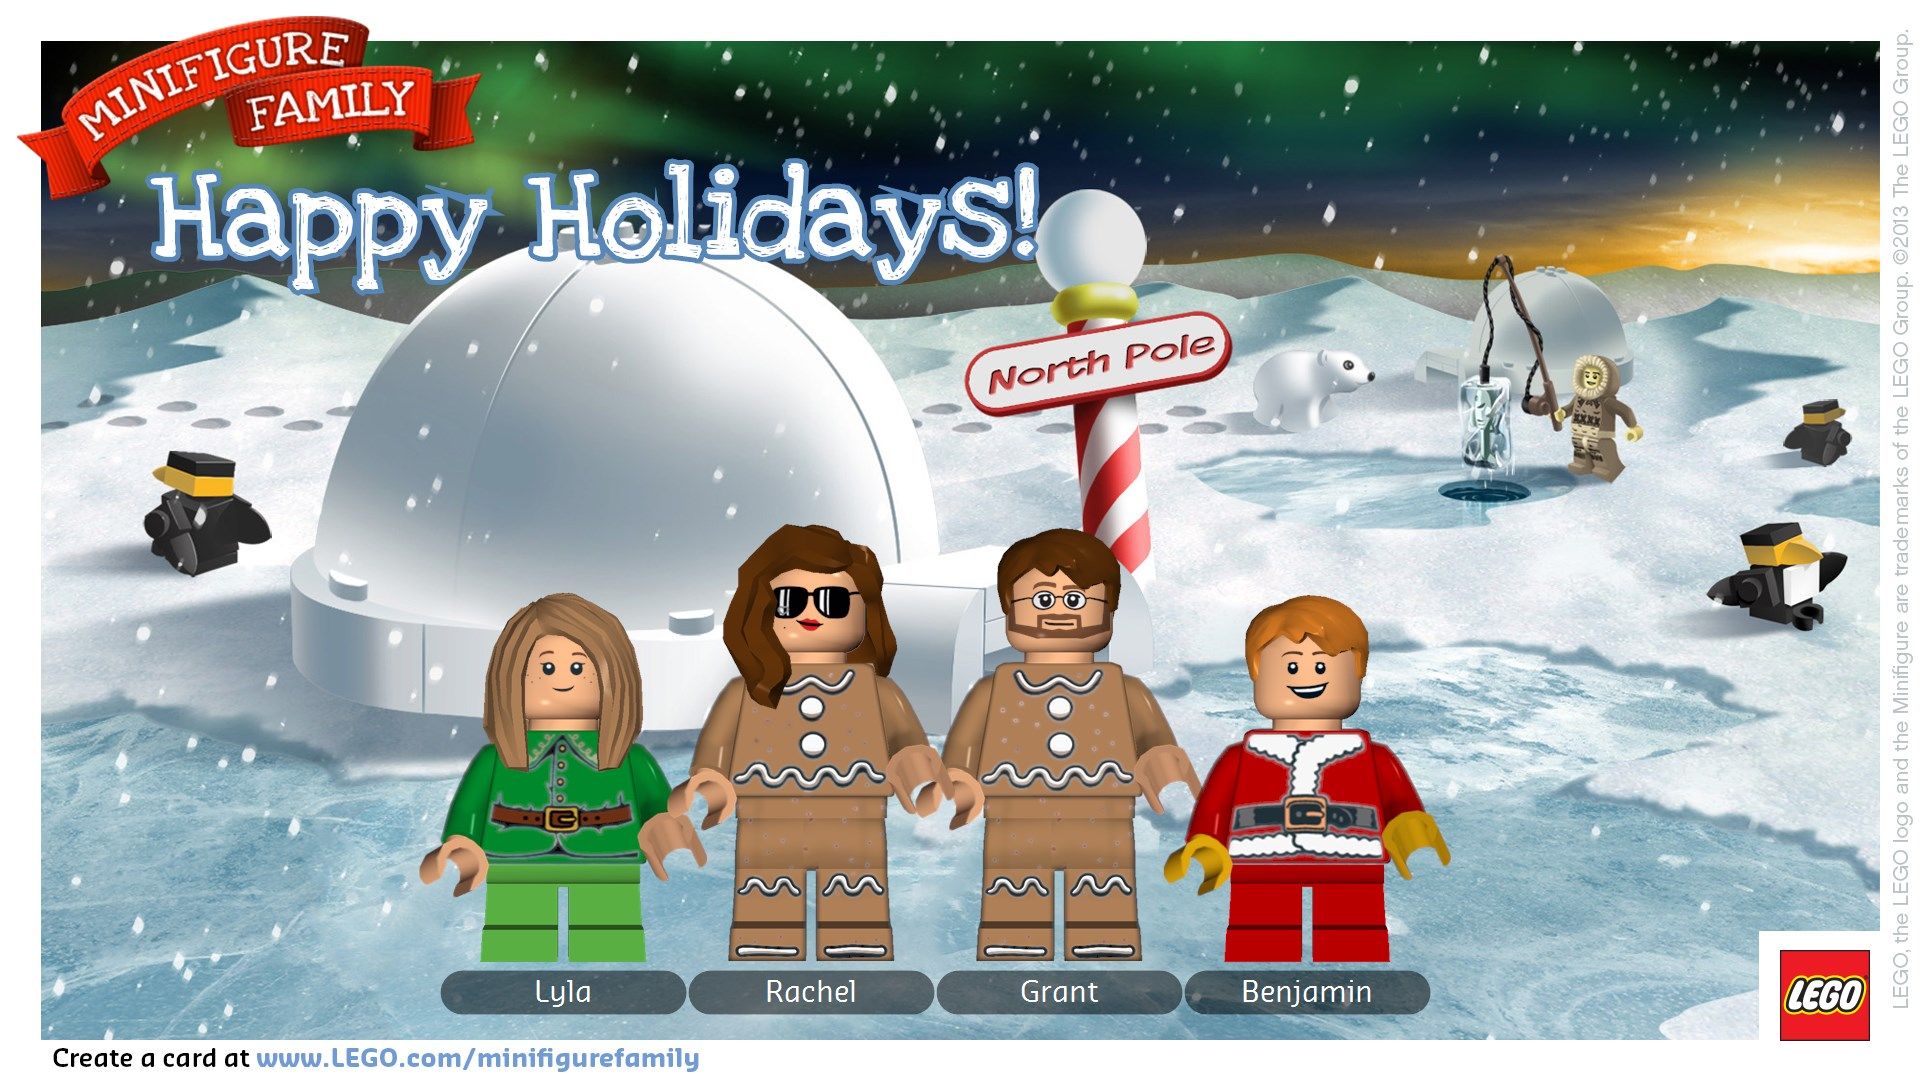
I think that I love LEGOs even more than my 4 year old son Benjamin does, which is saying a lot. LEGOS are just plain fun, encourage the imagination, and help you learn to build and create. When we saw that you could create your own LEGO Minifigure Family and send and share it as a holiday card, we were all over it!
Benjamin sat in my lap for about an hour as we created different versions of our family, and even other family members. He eventually wanted to turn everyone into a gingerbread man. After we designed all of the people, we arranged everyone in order, and picked a fun background. Our favorite was either the fireplace (love the little LEGO stockings) or the igloo.
I'm sure that Benjamin and I will make quite a few more versions over the next few days, and I suspect this will turn into a fun little tradition for the two of us. Make sure to check out the instructional video on how to make a LEGO Minifigure Family so that you can create your own. Remember, it's quick, easy, and free to do and it just takes one click to share with your family and friends on Facebook or Twitter. You can also save and download your card to print or use later.
For me fun family Christmas memories and pajamas go hand in hand. There is nothing like snuggling up together in pajamas by the Christmas tree or on the bed, and spending quality family time together. My kids get more excited about their pajamas than any other clothes they own, and look forward to picking them out and putting them on at night. Since my kids are still pretty young (Benjamin is 4, Lyla just turned 3, and our little boy is due in March), we are still making new traditions each year at Christmas. So this year, I shopped online at Sears to get some special new pajamas to be a part of our new holiday traditions this year. I was able to use my Shop Your Way rewards account to make a fun catalog of my favorite pajamas, as well as to earn rewards and save money on my purchases.
I especially love the traditional flannel button down pajamas at Christmas. For Benjamin, I picked out green pajamas with footballs and baseballs all over it. I like that they look like Christmas pajamas, but he can wear them all year long. Lyla's pajamas are my very favorite! Foxes are certainly a 2013 fashion trend, and these cute wintery fox pajamas are adorable. I love that they are a little bit girly without being all pink. And of course, Lyla loves them almost as much as I do.
10 Christmas Traditions to Celebrate in Your Pajamas
1. Make a Christmas book advent calendar. We love reading books as a family, and this year is the first time that we've attempted this tradition. It's such a fun idea for kids of all ages. Simply wrap up 24 books and number them from 1 - 24. You can wrap up mostly books you already own, and throw in a few new ones each year as your kids grow. Each night before bed, you unwrap the book for that day of December and read it together. We started with How the Grinch Stole Christmas, and save The Night Before Christmas for Christmas Eve. The kids are thrilled to open a new book each night, and we all enjoy snuggling up on the bed in our cozy pajamas to read the new book together. We also have wrapped up a lot of books that aren't explicitly Christmas, but that fit in with the Christmas and winter spirit (for example: The Little Engine that Could, The Snowy Day, Polar Bear Polar Bear, and The Mitten.)
2. Have a fun Christmas Lights Photo Shoot - Christmas lights are one of the most special and magical parts of the season, and are a very fun photo prop for taking cute pictures of your kids. Not only do they give a fun glow to your pictures, but they also help create fun expressions on your kids' faces. I love the expression on my son Benjamin's face. This year when I asked him what he wanted for Christmas, the only thing he came up with was more Christmas lights. Of course be VERY careful when letting your kids play with or sit near lights. 3. Have a Family Movie Night - This is a classic that is fun for the whole family. Pop some popcorn, snuggle up in your new pajamas, and watch your favorite Christmas movies together.
4. Make a Keepsake Craft Together - There are so many fun crafts to make as a family, and doing it in your pajamas makes it even more fun. Our favorite thing we've made this year are these Clay Thumbprint Snowman Ornaments. They turned out beautifully and Benjamin and Lyla really especially enjoyed making them.
5. Record Yourselves Singing Christmas Carols - We love singing Christmas songs together, and this year, we got dressed up in our pajamas and recorded the kids singing Christmas songs (twinkle twinkle little star counts!) I even recorded myself singing with them, but for your sake I won't share that video with you, haha. Benjamin and Lyla LOVE watching themselves over and over as they sing. This is the first year we've recorded them like this, and it will be fun to have a few videos of them each year to watch together each Christmas as they grow older.
6. Drive Around and Look at Christmas Lights - Everyone loves driving around town looking at Christmas lights, but why not do it with everyone in their pajamas. This will make it even more fun and exciting, plus your kids will think it's hilarious that Mommy and Daddy wore their pajamas outside of the house.
7. Bake and Decorate Cookies - Another classic Christmas tradition that is just more fun in your pajamas!
8. Have a Christmas Scavenger Hunt - This is so much fun. Everyone gets in their pajamas and has a flashlight. Turn the lights low in your house, and hide about 10 Christmas ornaments around your house. When someone finds an ornament, they put it in their special basket. Make a list of what you are looking for, and create a fun prize for your kids to earn if they find all of the ornaments. We created this game for my kids this year as a team effort, but as they get older, it would be fun to hide even more ornaments and turn it into a big contest.
9. Look at Family Pictures and Videos - Whether you are scrolling through pictures you've uploaded to Facebook over the past few years, or browsing through scrapbooks you have made, this is a fun way to spend time together and turn an activity into a tradition. You can relive past Christmas mornings, talk about how much everyone has grown, and look forward to this year's Christmas.
10. Wrap Gifts - It's important to teach your children that Christmas is about GIVING and not just about getting. One way that we try to do this (it's really a hard thing to do!) is to talk to them about how fun it is to give gifts, and to let them be a part of picking out gifts and wrapping them as much as possible. Snuggling up in your pajamas and letting your kids help decorate and wrap is a great way to do this. As you wrap the presents you can talk about how much you love the person who the gift is for, and talk about how happy it will make them when they open it.
For more style inspiration you can follow along with @searsStyle on Twitter and Facebook. You can also view or follow this Pinterest board for more great ideas:
What are some of your favorite Christmas PJ traditions?
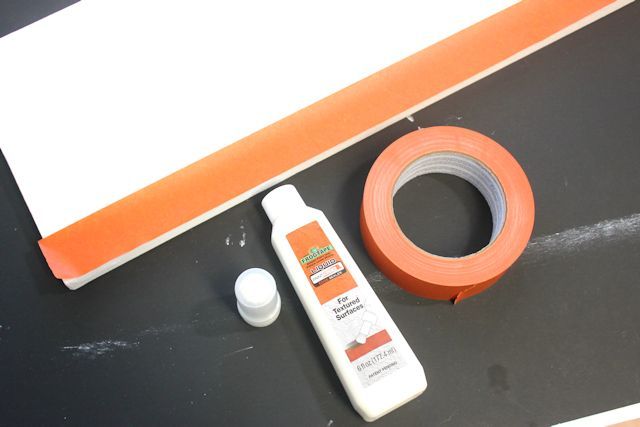
Have you ever tried using tape on a textured or bumpy surface, and found that little bits of paint leaked underneath the lines of the tape? I know I have. It even seems to happen when using spray paint. I had been wanting to make a Christmas Tree sign on a long canvas, but was worried about getting clean lines on a textured surface. That's why I was thrilled to get to try out FrogTape Textured Surface. I was already obsessed with the great technology of FrogTape®, and love the idea of a textured surface tape. The walls in my house are already pretty textured, and I've had trouble in the past getting clean lines with regular painter's tape.
You may have noticed that I have a little obsession with triangles. I especially love triangle Christmas Trees (like this Christmas iPhone wallpaper I shared, and this stamped fabric wrapping paper). I also especially love glittery gold and white together for Christmas decorations.
What you do:
1. Paint your canvas whatever background color you want. I painted mine white. (Even if you want a white background, you should paint the white canvas white. It will give everything a uniform look and texture.) Make sure the paint has ample time to dry.
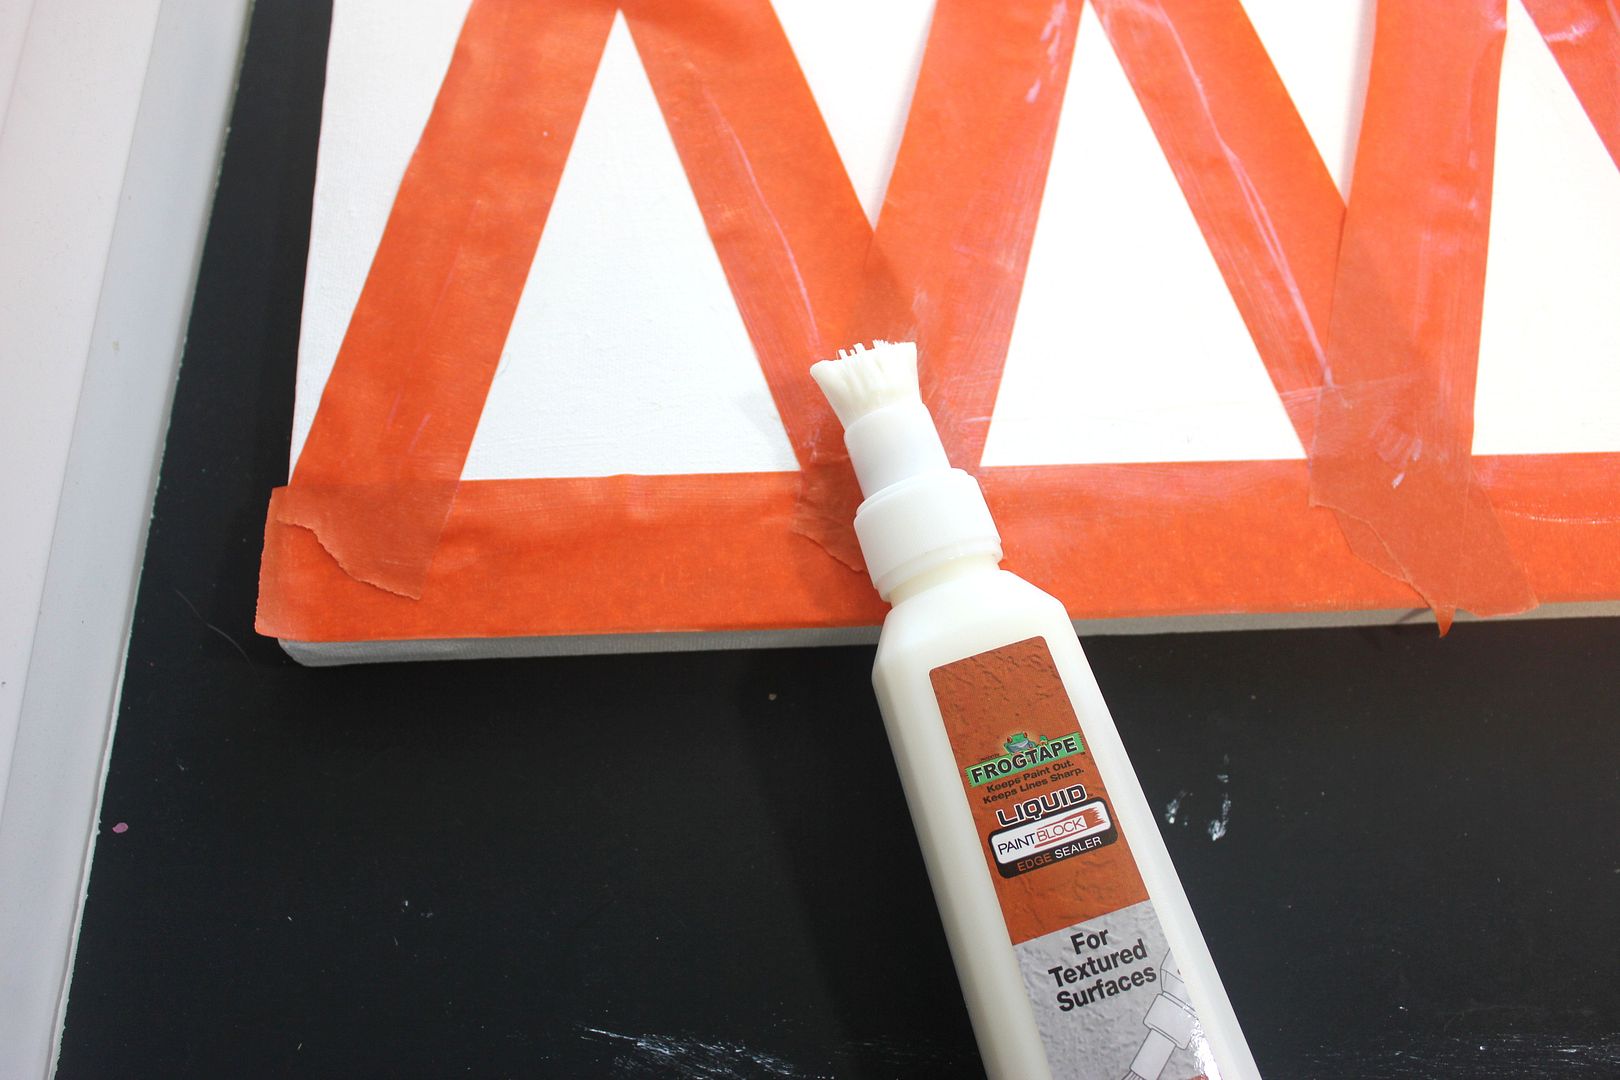
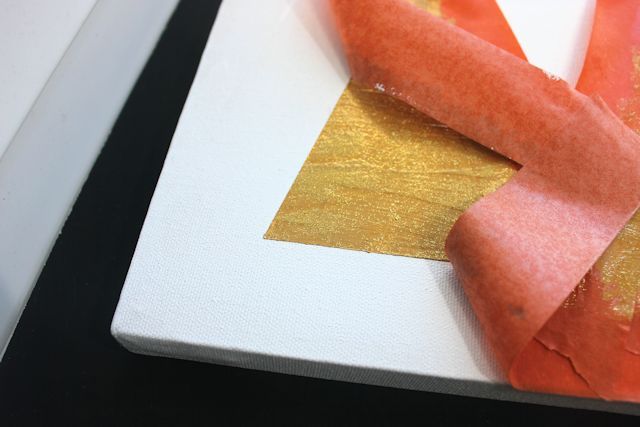
2. Measure your canvas and decide how wide you want each Christmas Tree to be. I wanted 5, so they ended out being 3 inches wide with 1.5 inches (the width of the tape) in between each of them. Place your tape on the canvas where you want it. It didn't stick that well until I wiped on top of the tape with a damp cloth. The damp cloth activates the tape's technology.
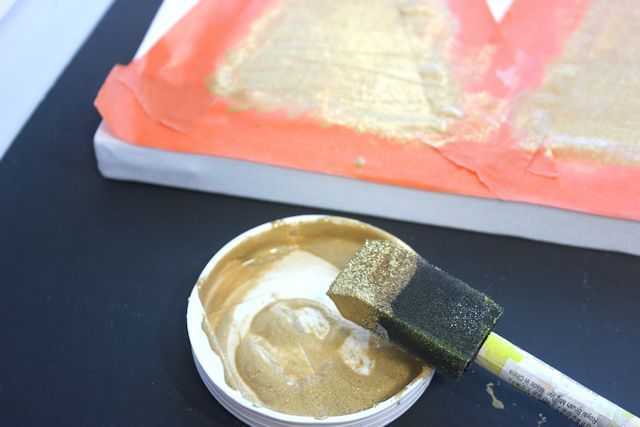
3. Use the applicator brush to seal the edges. Wait 15-20 minutes to let it dry. (Be sure to read the detailed instructions on this bottle for more tips.)
4. Paint your trees. I painted mine gold. I used two different gold paints. The first is a darker gold base. The second is more transparent and glittery. I used two coats of each. Even though the edges are sealed well, I recommend brushing away from or along the tape lines. Brushing from the middle area towards the paint lines encourages smearing and leaking.
5. Take the tape off immediately when you're done, and let the paint fully dry. Add embellishments or anything else you want to add. I decided to leave mine simple for a modern and geometric look, but there are a lot of fun ways to decorate your triangle trees.
*I got a chance to check out theDollar TreeValue Seeker's Cluband recreate this fun craft as a part of a
sponsored post through Blueprint Social. As always, all thoughts opinions and
photos are my own.
I love wandering around the Dollar Tree looking for things I can
use in a craft. Sometimes though, it's nice to have a little direction and a
specific project in mind. Today I'm sharing a fun and easy craft that I found
at theDollar TreeValue Seeker's Club. It's
free to join, and full of great craft ideas, decor tips, money saving
solutions, insider information, and even contests. There's all kinds of new
ideas that are shared there, and it's an especially great source of inspiration
for us crafty people.
You can get everything you need to make these snow globes at the
Dollar Tree, from the lidded jars, to glue and glitter. Since there isn't any
water in them, you can get really creative and put all sorts of fun things
inside, even family photos. I especially love the vintage look of the jars and
bottle brush trees together. You can view this project's tutorialhere. I also added some glue and white glitter to the inside top of the jar to make it look like it was snowing.
If you've found a project you love from theDollar TreeValue Seeker's Club, you
can easily print the sheets from home and take them to the store with you, or
save them to your computer to check out later. I have quite a few saved on my
computer.
I am giving away one $100 Dollar Tree gift card to one lucky reader.
Think about how many snow globes you could make with that?? Enter below through
the Rafflecopter Widget.
*I got to test out the Walgreens Mobile App as a part of a sponsored post through Collective Bias Social Fabric. As always, all thoughts and opinions are my own. #WalgreensApp
Confession: I've never sent out Christmas cards before. Ever. I always want to and mean to, but somehow I never do. I end out waiting until it's too late hoping to get that perfect family photo together that just never seems to happen. However, this year, I've already printed some cute photo cards and I'm ready to send them. I was already a huge fan of the Walgreens Mobile App. I've used it many times before to print photos directly from my phone. It's an especially great way to print Instagram and Facebook photos and it makes it so easy. But this year I've learned you can also design and print holiday cards from your phone using the Walgreens Photo App.
Creating these cards was so easy. The hardest part was choosing just one (which is why I chose 2). I wanted to make the cards using a photo I had taken that captured a special moment for Benjamin and Lyla instead of a staged family photo this year. I love this picture of the two of them on the haystacks, and it's one of the few pictures where they are wearing long sleeves (Oh, Florida weather...).
What you do:
1. Open the Walgreens Mobile App (make sure you've updated it recently)
2. Click on Photo.
3. Click on Photo Cards.
4. Select a Card (the hardest part of the process!)
5. Add your picture.
6. Add your text. You can play around with fonts and colors, but I mostly stuck with the recommended ones for each card.
7. Click print to Walgreens. Mine were ready in about 30 minutes.
(Important Tip: If it looks like the text is sticking off the bottom of the card in the preview, it is. The card will turn out just like this, and will crop off the letters. Fortunately, the Walgreens photo people are very helpful and nice and will reprint them, crop them, or let you cancel the order.)
The cards come packed up in a cute box, plus they include envelopes. I really love the craft paper and pink look of this card. I also love the round images surrounded with wreaths.